1. Prepare Wall Surface for Plastering
Proper wall preparation is key to a smooth and lasting plaster finish. Making sure the surface is clean and stable makes the plastering process much easier.Clean the Wall Thoroughly
Thoroughly cleaning the wall is the first step before applying plaster. Dust, dirt, grease, and loose particles should be removed using a brush, vacuum, or damp cloth. A clean surface ensures plaster sticks evenly and prevents uneven finishes. Proper cleaning also reduces the risk of cracks and peeling over time. Even small debris can weaken the plaster layer. Careful attention to wall preparation lays the foundation for a smooth, long-lasting result.Inspect for Damage
Inspect the wall for cracks, holes, or flaking paint. Small cracks can be filled with plaster or filler, while larger structural issues may need professional repair. A solid wall ensures durability and a better final finish. Checking for damage helps plan the plastering process. Weak spots can affect adhesion and appearance. Addressing these issues early saves time and improves overall results.Remove Loose Paint or Wallpaper
Removing peeling paint or old wallpaper ensures the plaster bonds correctly. Any leftover paint or wallpaper can prevent proper adhesion and may cause cracks. Carefully preparing the surface for plastering a wall at this stage ensures the plaster will stick evenly. A clean, bare surface provides a strong base for smooth results. Eliminating old finishes reduces future repair work. This step also helps create a professional-looking wall that lasts for years.Dampen the Wall
Slightly dampening the wall helps control the plaster’s drying process. Use a sponge or a spray bottle to lightly moisten the surface. Moist walls help plaster dry more slowly, reducing the risk of cracks. Dampening also allows more working time when spreading and smoothing plaster. Mastering plastering a wall properly is easier on a slightly moist surface. Proper moisture management contributes to a smooth and long-lasting finish.2. Gather Tools and Materials Needed
Before mixing and applying plaster, it’s crucial to have all the necessary tools and materials ready. Working without the proper equipment can slow you down and compromise the quality of your finish. Here’s a list of essentials:- Plaster: Choose the appropriate type for your wall. Common options include gypsum plaster, lime plaster, or cement-based plaster.
- Mixing Bucket: A large bucket used to combine plaster with water.
- Trowel: A flat metal tool for spreading plaster onto the wall.
- Hawk: A flat square tool used to hold plaster while applying it.
- Plastering Float: Helps smooth and level the plaster.
- Sandpaper or Sanding Block: For finishing touches after drying.
- Protective Gear: Gloves, mask, and goggles to protect yourself from dust and chemicals.
- Water and Measuring Tools: Accurate measurement of water and plaster is key to achieving the right consistency.
3. Mix Plaster with Correct Consistency
Always follow the manufacturer’s instructions when preparing plaster to maintain the correct water-to-powder ratio. Pour clean water into the bucket first, then gradually add the dry plaster while stirring to avoid air bubbles forming. Mix thoroughly until you achieve a creamy, lump-free consistency that stays on the trowel without dripping. Test the mixture by scooping a small amount onto the hawk and spreading it against a flat surface. If it sticks well and spreads without tearing, the texture is correct. Overly thick plaster is difficult to spread evenly, while watery plaster slides off before setting, leading to frustration and patchy results. Avoid mixing too much at once, as plaster starts setting within 20 minutes, depending on the room temperature and type used. Instead, prepare small batches that can be applied quickly without rushing or wasting material. Consistent mixing reduces variations across layers and supports better durability over time.4. Apply First Coat on Wall Surface
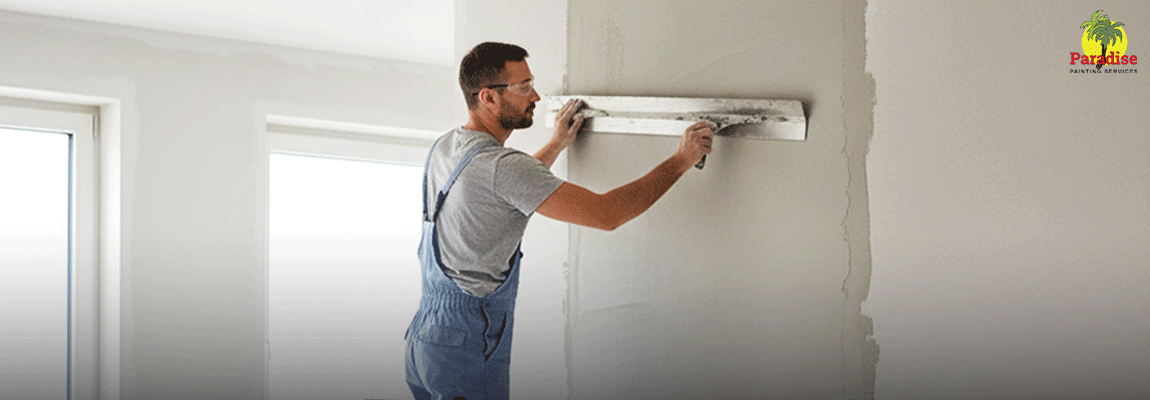
Start from the bottom corner of the wall and work your way upward using smooth strokes and medium pressure. Scoop plaster onto the hawk, then transfer it to the trowel and spread it in sweeping motions to evenly cover the surface. Each pass should overlap slightly to prevent gaps or uneven thickness. Focus on maintaining a uniform thickness of about 2mm to 3mm for the base coat, avoiding heavy pressure that may drag plaster off; press it on instead. Reload the trowel as needed, but do not let material pile up too thick in one area, as this can cause drying issues. Edges and corners need special attention to avoid build-up. After covering a section, use a straight edge to smooth out high spots and blend overlapping lines. Work quickly but carefully to finish a wall before the plaster begins setting, which typically happens within minutes. If applying over old surfaces, a pre-treatment coat known as a scratch coat may be needed to help grip.5. Smooth Surface Before Second Layer
Once the first coat is partially dry, usually within forty minutes, depending on ventilation, it becomes ready for flattening. Use the trowel with lighter pressure to smooth any bumps, air pockets, or ridges left from the initial application. A water brush or a damp sponge can help reduce friction and smooth edges. At this stage, avoid digging into the plaster or making aggressive strokes that could expose the wall beneath. Instead, move gently across the surface in different directions to blend sections together for a level appearance. Use a corner trowel in tighter areas where standard tools may not reach comfortably. Ensure the wall is flat to the eye and to the touch before proceeding to the next layer. Touch up dips or thin spots by filling them lightly and smoothing out. Maintaining patience during this part helps reduce sanding later and sets a strong foundation for the finishing coat.6. Add Final Coat for Smooth Finish
After the base coat is firm but not fully dry, start applying the finishing layer with a slightly thinner consistency. Keep the thickness around 1mm to allow for fine control over details and ensure smooth blending across large surfaces. Move in broad strokes and apply even pressure to eliminate texture lines. Use the trowel edge to feather out joins and fade strokes into each other with minimal overlap. This coat must look neat, as it defines the final appearance before any decoration. A damp sponge can again help blend tricky areas, such as corners or uneven edges. Check the surface from different angles under natural light to spot imperfections that might not be visible head-on, and clean tools frequently between sections to avoid dried material scratching fresh plaster. A single, well-executed top layer avoids extra sanding or patching after drying.7. Allow Plaster to Dry Properly
Plaster should dry naturally at room temperature without the aid of heaters or fans, which can lead to cracking. Keep windows closed if intense sun or wind could disturb the surface during curing. The average plaster drying time before sanding and painting in NZ ranges from three to seven days, depending on humidity. Check for colour changes as a sign of drying, where darker spots usually indicate lingering moisture. Do not rush into further steps until the wall turns a consistent light tone throughout. Allowing complete drying helps prevent flaking or bubbling when adding primer or paint. Rooms with higher humidity, such as bathrooms or kitchens, may need extra time before sanding or sealing. Use a moisture meter if unsure whether it has cured fully before proceeding. Waiting improves adhesion for future layers and protects from internal damage caused by premature painting.8. Sand and Paint Wall After Plastering
Once dry, lightly sand the wall using fine-grit sandpaper to remove minor imperfections or raised spots. Be gentle during this stage as heavy sanding can ruin smooth finishes or reveal underlayers. Wipe off dust using a soft cloth or vacuum brush attachment to prepare the surface for paint or primer. Choose a primer that suits the plaster type and planned final finish, whether using water-based paint, wallpaper, or sealants. Apply a single thin coat of primer using a roller for even coverage across the entire surface. Let it dry completely before adding coloured paint or additional design elements. This final preparation ensures materials bond well and remain in place without peeling over time. Good lighting while sanding reveals flaws that can be corrected before sealing. Finishing with care ensures visual consistency and long-term durability across every section of the wall.Why Hire a Professional Plasterer
Plastering a wall is not easy and needs skill for a smooth finish. Hiring a professional makes sure the work is done well and lasts a long time.- Expert Knowledge: Professionals understand the different plaster types and the best methods for each wall type. Proper application creates a durable and even surface.
- Time Efficiency: Jobs are completed quickly compared with DIY attempts. Experience allows work to flow smoothly without delays.
- Cost Savings: Mistakes are minimised, reducing repair costs and wasted materials. Correct methods make every resource count.
- Quality Result: Walls look neat, consistent, and professional. Surfaces gain strength and maintain a polished appearance.
- Proper Equipment: Professionals bring the right tools for precise, clean application. Proper tools ensure smooth and even finishes.
- Peace of Mind: Confidence comes from knowing work is completed the first time. Walls stay strong and attractive for years.
Perfect Finish with Proper Steps on How to plaster a wall